
Creating food is my therapy. I find making food to be an enjoyable experience. — My Man
This is my partner’s recipe. He stands at the stove for the better part of a day and lets the bones do their slow work, and the result is the most nourishing thing in our kitchen. Homemade bone broth is one of the most healing foods I know — for sick days, for cold winters, for any season of gut repair. The version below is what we make on rotation, in big batches, and freeze for the months ahead.
If you’ve never made bone broth from scratch, the steps look more involved than they are. There are really only three commitments: the pre-boil to clean the bones, the oven roast to develop flavor, and the long simmer. None of them require attention — the stove does the work. You just have to be home.
Why homemade bone broth is medicine
Bone broth from real bones, simmered for hours, gives your body things you can’t easily get anywhere else:
- Glycine and proline — amino acids that support gut lining repair, connective tissue, and sleep
- Gelatin — the protein that turns into the wobble when broth chills; it’s what feeds the gut and the joints
- Minerals — calcium, magnesium, phosphorus, potassium, drawn from the bones over the long simmer
- Marrow — fat-soluble vitamins, bioavailable iron, and the rich, deep flavor
If you’re moving through a season of gut repair, cold and flu recovery, postpartum, or surgery recovery, this is the food your body is asking for. We drink it straight from a mug in the winter the way other people drink coffee.
What makes this version different
A few choices we’ve landed on after years of experimenting:
- The pre-boil step is non-negotiable. Some recipes skip it. We don’t. Boiling the bones for 10 minutes and washing the pot removes the grey-green impurity film that comes off bones from any animal. The broth ends up clearer, cleaner-tasting, and easier on sensitive guts. Don’t skip it.
- Ossobuco in addition to plain bones. The cross-cut shanks have meat, marrow, and connective tissue all in one piece. They give the broth body that pure marrow bones don’t.
- Roast everything together. Bones AND vegetables AND spices, all on the sheet pan, all at 400°F for 30 minutes. Most recipes only roast the bones. Roasting the vegetables alongside deepens the broth’s color and flavor noticeably.
- 8 to 14 hours, not 24. We’ve found 8 hours produces a lighter, drinkable broth and 14 hours produces something deeper and more gelatinous. Beyond 14 hours the flavor gets bitter for our taste. Pick your simmer based on what you want.
Pro tips
- Apple cider vinegar (optional, 1–2 tablespoons added before heating) helps draw minerals from the bones — the acid breaks down the bone matrix during the long simmer, so more calcium, magnesium, and trace minerals end up in the final broth. We sometimes add it, sometimes don’t, depending on the batch.
- Don’t oversalt during the simmer. The broth concentrates as it cooks. Season at the end, in the jar or in the cup.
- Skim the foam in the first hour or two. After that, leave it alone.
- The fat that rises to the top after refrigeration is good fat — use it for roasting vegetables, sautéing, or skim and discard if you prefer a leaner broth.
Ways to use it
A jar of homemade bone broth becomes the base of half the food in our kitchen:
- Sipped straight from a mug as breakfast or a mid-afternoon nourishment
- As the base for soups — vegetable, chicken, beef, miso
- For cooking grains — quinoa, rice, oats — instead of plain water (huge flavor and nutrition upgrade)
- For braising vegetables and meats — pot roast, brisket, root vegetables
- As a sick-day food when nothing else feels right
- Frozen in ice cube trays for quick deglazing and small additions to sauces
- As the building block for my instant bone broth soup — when we’re traveling and need the portable version
Giving it as a gift
One of our favorite things to do is give jars of finished bone broth to friends — especially new parents, people moving through illness, people in postpartum recovery, or anyone in a hard season. It’s homemade nourishment that says I see you and I want your body to have this. There’s almost nothing in the modern food landscape that carries that kind of meaning.
Cool the broth completely, ladle into wide-mouth quart jars, leave 1 inch of headspace if you’re freezing, and label with the date. A jar of bone broth says more than any card.
Recipe
Homemade Beef Bone Broth — My Man’s Recipe
Prep: 15 min · Cook: 12 hr 40 min (10 min pre-boil + 30 min oven roast + 12 hr simmer) · Total: 12 hr 55 min · Yield: about 2 gallons (12–16 servings)
Ingredients
- 3–4 pounds organic beef bones (a mix of marrow bones and knucklebones is ideal)
- 2 pounds ossobuco (cross-cut beef shanks with marrow)
- 3 onions, peeled and quartered
- 1½ heads garlic, cloves peeled
- 1 pound carrots, scrubbed (no need to peel)
- 1 teaspoon ground cumin
- 1 teaspoon freshly ground black pepper
- Sea salt, to taste
- 2 gallons filtered water
Instructions
- Place the bones and ossobuco in a large stockpot, cover with cold water, and bring to a boil. Boil for 10 minutes — this is the pre-boil. A grey-green slimy film will rise to the surface; that’s exactly what you want to remove.
- Drain the bones and meat into a colander, then rinse thoroughly under cold running water. Wash the stockpot completely with soap and hot water (it will have a film on the inside).
- Refill the cleaned stockpot with 2 gallons of fresh filtered water. Place over high heat to start coming up to a boil while you handle the roasting step.
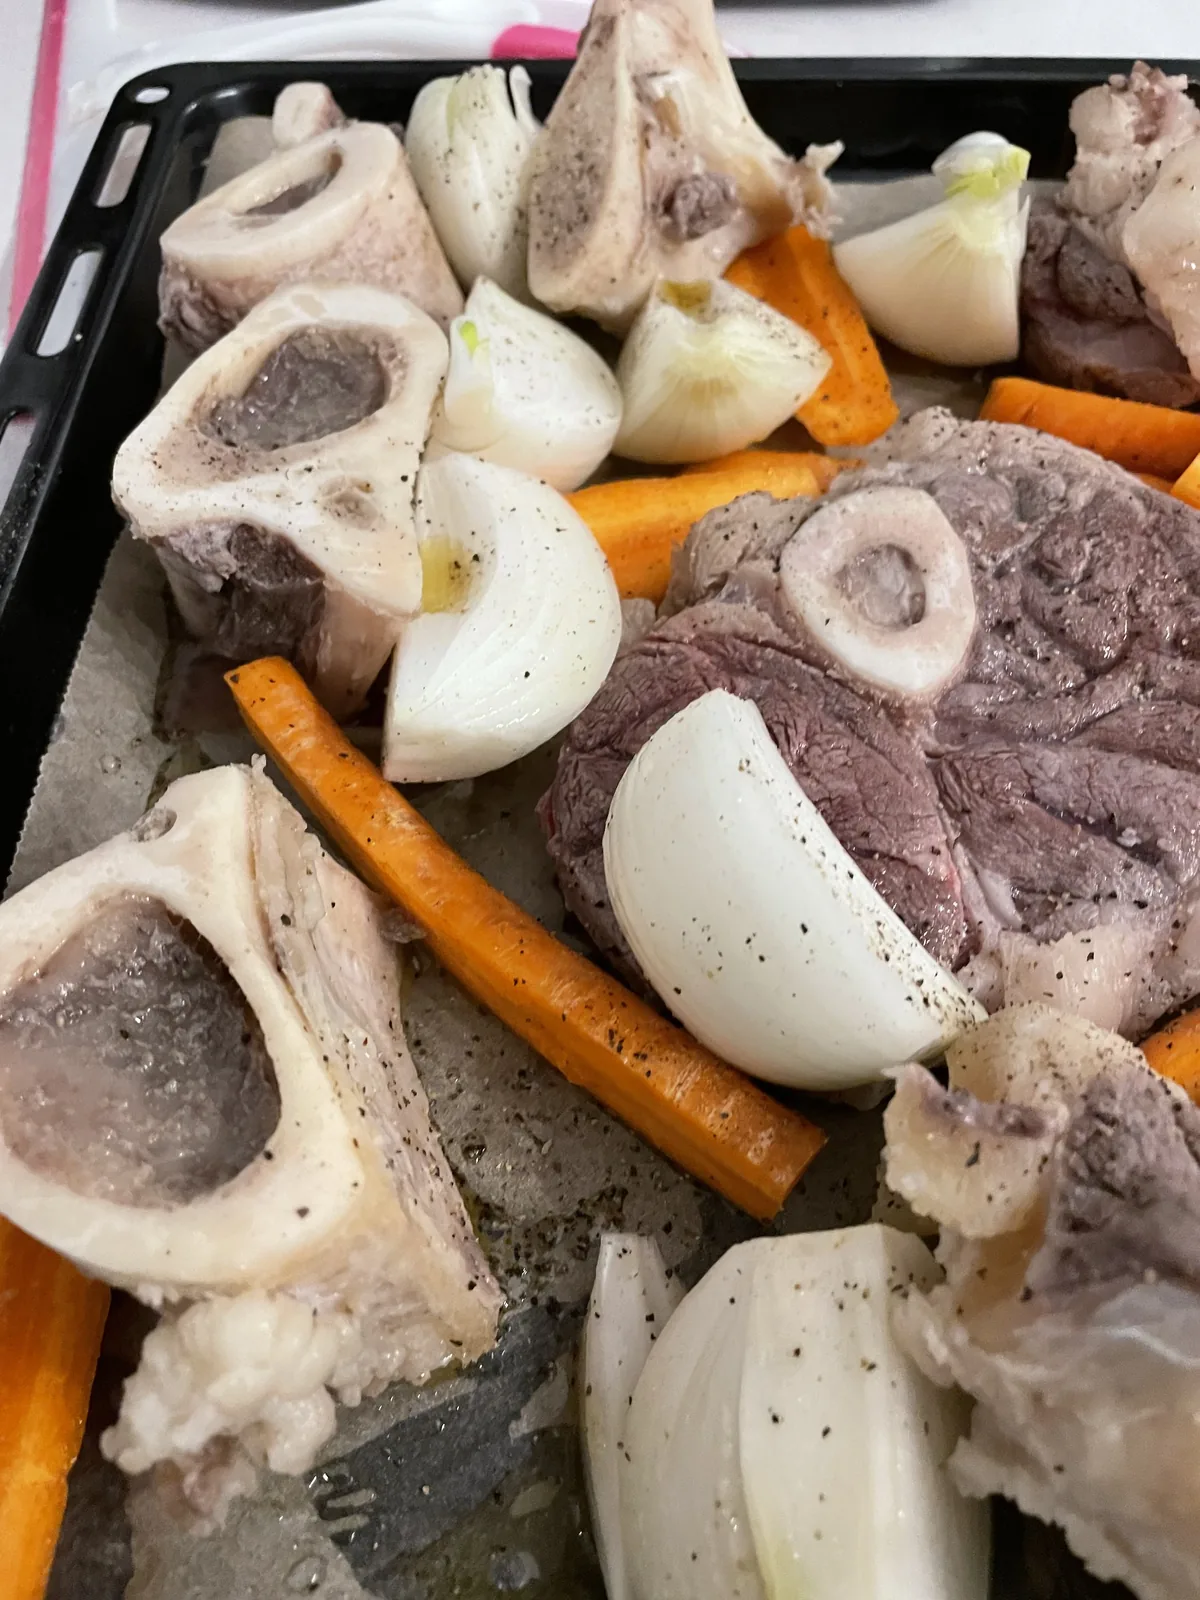
- Heat the oven to 400°F (200°C). Spread the pre-boiled bones, ossobuco meat, quartered onions, peeled garlic cloves, and whole carrots on a sheet pan. Season generously with cumin, black pepper, and a pinch of salt.
- Roast in the oven for 30 minutes, until the bones and vegetables are deeply browned. This is where the flavor lives.
- Transfer everything from the sheet pan — bones, meat, vegetables, and the rendered fat — into the pot of boiling water. Scrape the pan with a wooden spoon to get every bit of caramelized goodness in.
- Bring the pot back up to a boil, then reduce to the lowest simmer your stove can hold. Cover with the lid cracked slightly.
- Simmer for 8 to 14 hours. The longer you go, the deeper the broth. 12 hours is a sweet spot. Skim any foam that rises in the first 1–2 hours.
- Turn off the heat. Let the broth cool with the bones still in it for at least 30 minutes.
- Strain through a fine-mesh sieve into clean jars or storage containers. Season with sea salt to taste.
- Refrigerate for up to 7 days, or freeze for up to 6 months.
A final note
Bone broth is one of the foods I’d want at the table if I had to pick a short list. It’s quiet, slow, ancestral food — the kind that doesn’t translate well to social media but transforms how you feel in your body. We make this in big batches every few weeks, drink it through the cold months, and gift away the rest. If you’ve been on the fence about making it yourself, this is your sign. The stove does the work. You just have to start.
Until next time, have a beautiful day.
— Chandra Zas