
When my partner and I started traveling less often and staying in our own kitchen longer, mayo was one of the first recipes we brought into our regular family life — alongside pesto. Mayo is one of my all-time favorite foods, and getting it right at home meant we could keep eating it without compromising on the ingredients. We just had to land on a version that worked every time.
The version below is what we landed on after countless taste tests, ratio tweaks, and a few mayo-shaped disappointments along the way. It’s clean, creamy, and built on real ingredients you can pronounce. Every time we bring it to a gathering, someone asks for the recipe. So here it is. (Honest note: every once in a while a batch still breaks on us and we have to toss it. It happens. Don’t take it personally — start over with fresh eggs.)
A note before we begin: most “avocado oil” isn’t avocado oil
If you’re going to make homemade mayo specifically to avoid seed oils, the brand of avocado oil you buy matters more than almost anything else in the recipe. There’s currently no enforceable USDA purity standard for avocado oil in the U.S., which means the bottle on the shelf labeled “100% pure” or “extra virgin” often isn’t either.
Researchers at UC Davis tested commercial avocado oils sold in the U.S. and found that 82% of samples were either rancid or adulterated with cheaper oils — often soybean oil, sometimes high-oleic sunflower or safflower. In a few cases, bottles labeled “pure” avocado oil were closer to 100% soybean oil. A follow-up study on private-label (store brand) avocado oils found 70% failed the same way.
Only two brands in the original study came back consistently pure: Marianne’s Harvest Avocado Oil and Chosen Foods. Both are refined avocado oils made in Mexico, and both are the only brands I use. We buy Marianne’s at Costco — it’s the most cost-effective clean option I’ve found, especially for a recipe that uses 2 cups at a time.
If you’re going to skip seed oils, do the brand step properly. Otherwise you’re making seed-oil mayo with extra steps.
Why we now use a Vitamix (food processor still works)
We’ve made this recipe in regular blenders, immersion blenders, and food processors over the years. The Vitamix is now our favorite — specifically the blender pitcher, not the food processor attachment. The food processor attachment only runs at one speed (fast), which means you can’t ramp up gradually as the emulsion forms. The blender lets you start slow and feel your way through.
The other thing I love about the Vitamix blender for this recipe is the cleanup. Fill the empty pitcher halfway with hot water, add a drop of dish soap, run it for 30 seconds, and the blender washes itself. Rinse, dry, done. A food processor has the S-blade, the bowl, and the lid to scrub by hand — which is the only annoying part of making mayo regularly.
That said: a standard food processor or any blender will work. You’ll just need to keep an eye on the emulsion and adjust by feel. The blender I reach for is the Vitamix E310 Explorian. If you’d rather keep your food out of contact with plastic, Vitamix also makes a 48-oz stainless steel container that fits the full-size machines — the same plastic-free swap I use for cashew milk.
A good food processor runs around $25 used or $80–$150 new. A Vitamix is a bigger investment but earns its keep across mayo, smoothies, soups, nut milks, and more. Immersion blenders are great for soups; for mayo they’re inconsistent.
Egg quality matters just as much as the oil
Mayo magnifies whatever you put into it. Two large pasture-raised eggs go into every batch, and what those chickens ate, how they lived, and how fresh the eggs are all show up in the final flavor and the nutritional profile.
We currently get our eggs shipped from Angel Acres Farms — regeneratively farmed, exceptionally well-treated chickens, the most-tested eggs we’ve found, and notably low in polyunsaturated fats. See the full egg-sourcing breakdown in my Egg Soup post.
Clean inputs in, clean mayo out.
How to make it
The full step-by-step is in the recipe card below. Two things worth flagging:
It’s faster than you’d think. The whole thing takes about two minutes of blending — 10 seconds for the eggs, 30 seconds to pour the oil, and another minute for the texture to set. Watch the blender; you’ll feel the moment the mayo solidifies because the motor will start to resist.
Texture is a choice — driven by oil amount, not pour speed. My husband likes a slightly runnier mayo (less oil); I like mine thicker (more oil). Smaller eggs need a little less oil; larger eggs a little more. And no matter how it comes out of the blender — runny, perfect, or thick — it’ll firm up a little more in the fridge. Account for that final set when you’re aiming for a specific texture.
Garlic mayo — the optional variant
A small piece of fresh peeled garlic — about a quarter of a clove, not more — added to the blender with the eggs at the very beginning gives you a clean garlic mayo that holds up to anything: burgers, roasted vegetables, sweet potato fries. On the first day it has a slightly spicy bite; by day two it mellows beautifully (like a pesto does after it rests). A small splash of high-quality balsamic alongside the garlic adds a subtle complexity you’ll notice but won’t immediately identify — also optional. If you’re new to homemade mayo, make a plain batch first so you know what the baseline tastes like. Then play.
How we use it
This mayo is the workhorse in our kitchen. We use it for:
- Slathered on burgers and grass-fed beef patties
- Drizzled over roasted sweet potatoes with sea salt
- Mixed with canned tuna, chopped pickles, and salt and pepper for a quick lunch — genuinely one of my favorite fast meals (I might write this up as its own post one day)
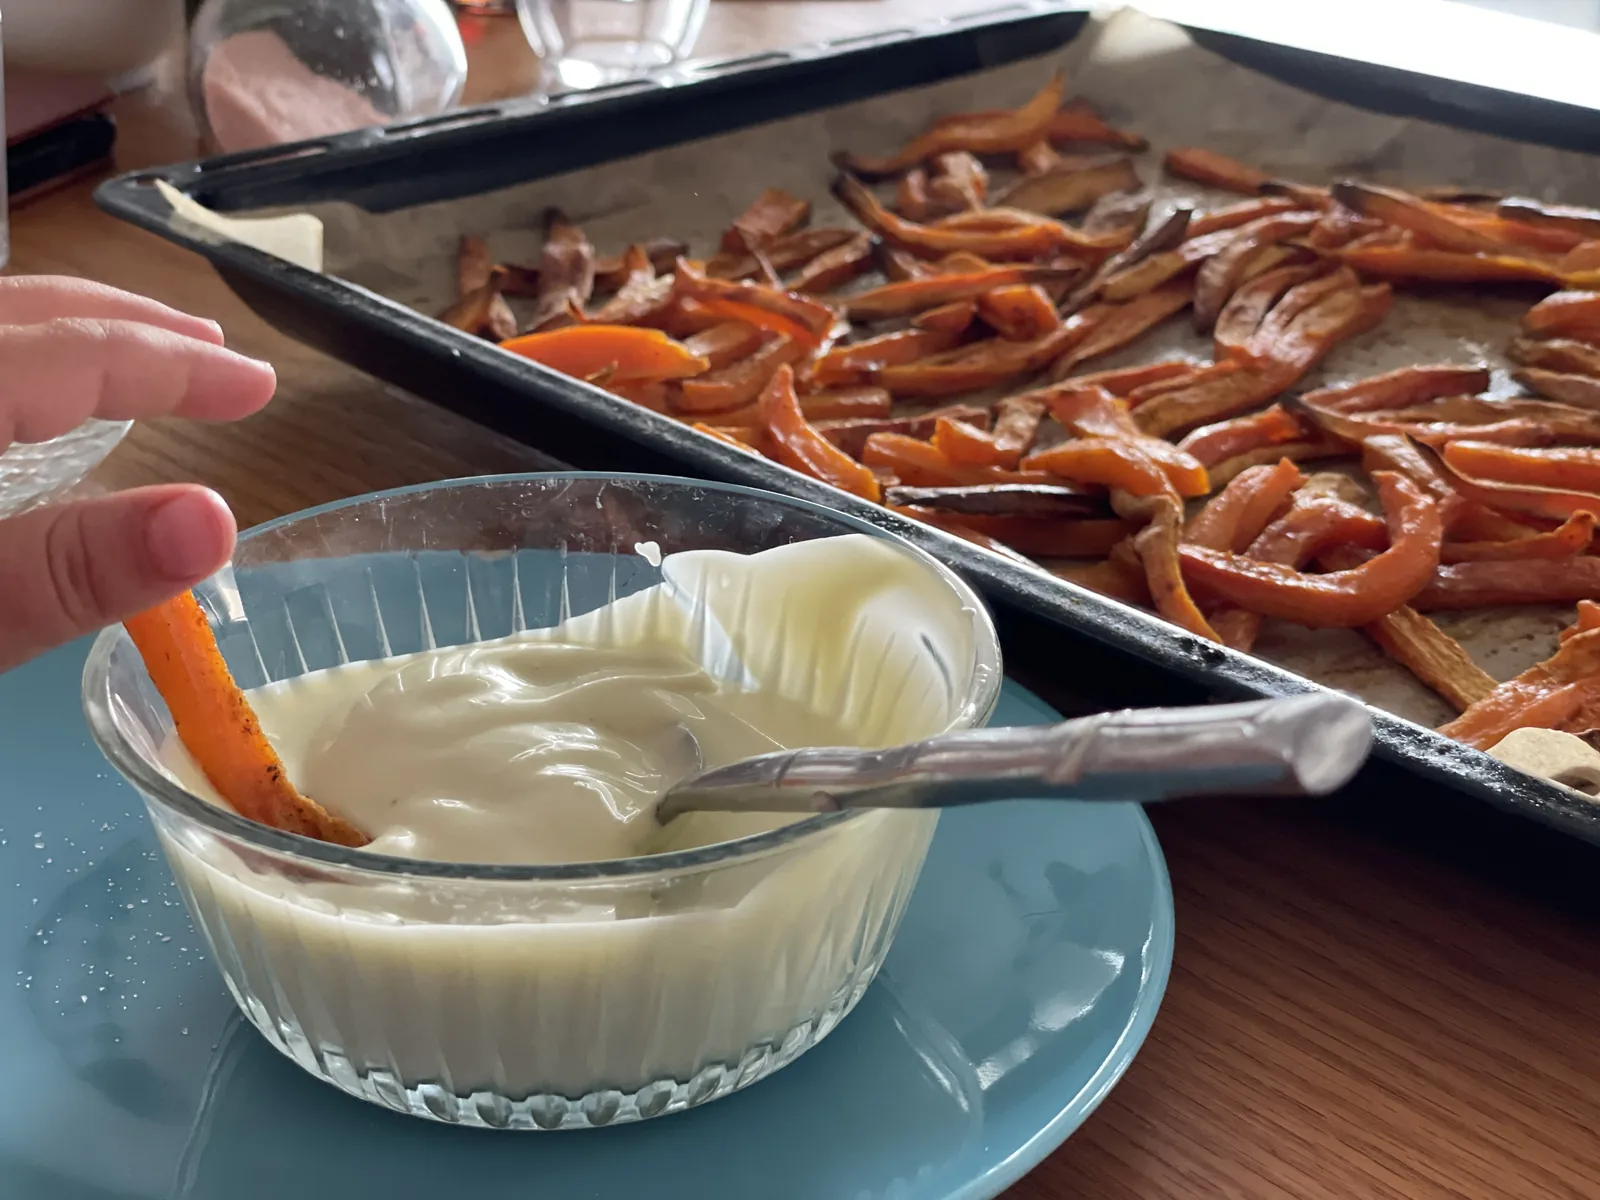
- As a dipping sauce for roasted vegetables — especially sweet potato chips (see below)
Storage
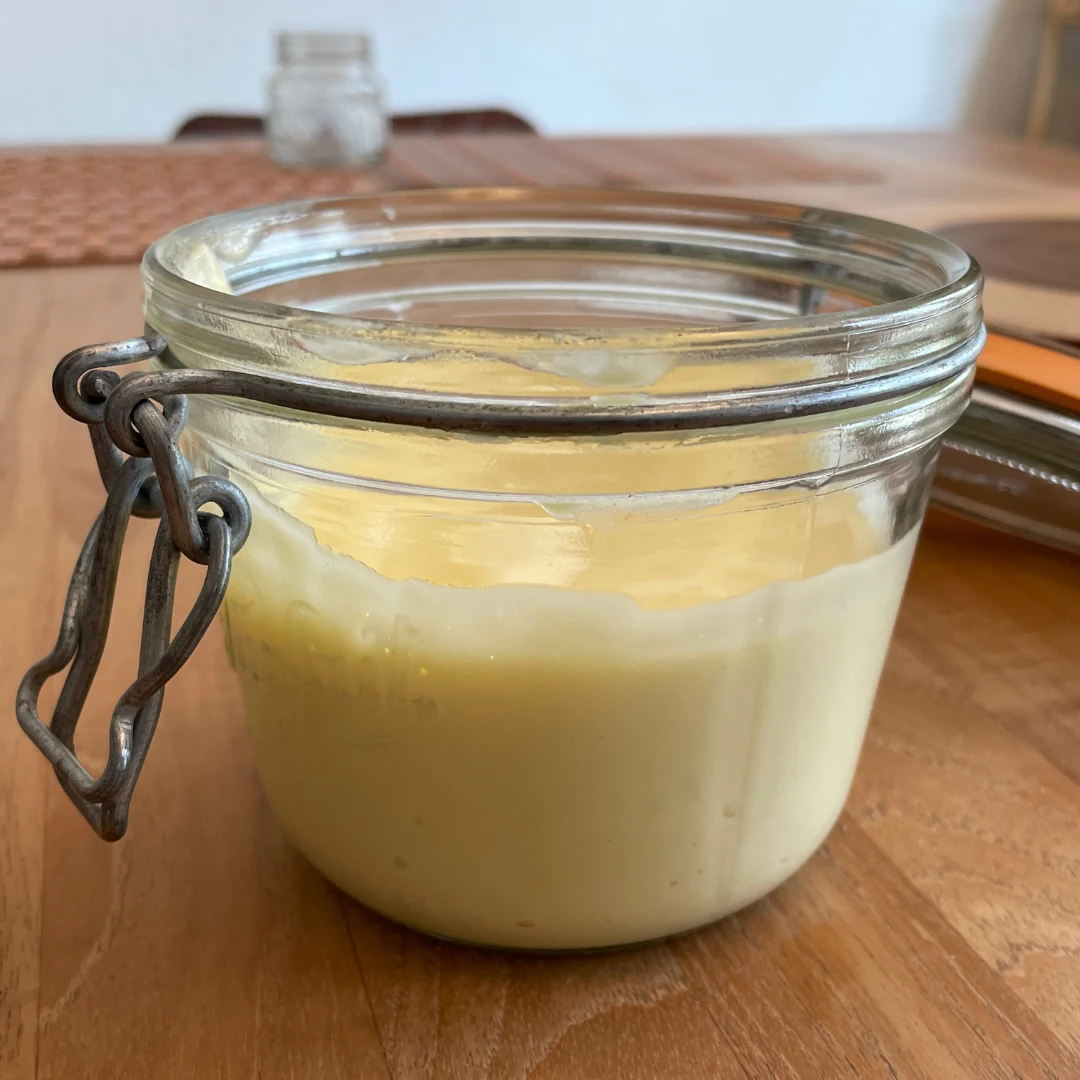
Transfer the finished mayo to a clean, wide-mouth glass jar with a tight lid. Refrigerate immediately. It keeps for about 5 to 7 days — after that it starts to separate and get weird, so plan accordingly. In our kitchen it rarely lasts that long anyway, because we use it on everything.
Recipe
Avocado Oil Mayo (No Seed Oils)
Prep: 1 min · Cook: 2 min · Total: 3 min · Yield: about 2 cups (double batch)
Ingredients
- 2 large pasture-raised eggs, at room temperature (we ship ours from Angel Acres Farms)
- 1–2 teaspoons fresh lemon juice (or raw apple cider vinegar)
- 1–2 teaspoons fine sea salt
- ¼ clove garlic, peeled (optional — yes, just a quarter clove)
- A small splash of high-quality balsamic (optional)
- About 2 cups Marianne’s Harvest or Chosen Foods avocado oil (less for runnier mayo, more for thicker — adjust to taste)
Instructions
- Add the eggs, lemon juice (or ACV), salt, and optional garlic and balsamic to a Vitamix blender (our favorite) or food processor. Blend on a medium speed for about 10 seconds until the eggs look light and airy.
- With the blender still running on medium, slowly pour in the avocado oil over about 30 seconds. If your blender has a measuring cup on the lid, watch the level and stop pouring right around the 2-cup mark.
- Let the blender run another minute or so. You’ll feel the texture shift — the blender will start to resist as the mayo solidifies. That’s how you know it’s there.
- Adjust thickness by how much oil you pour: less oil = runnier mayo (my husband’s preference); more oil = thicker mayo (mine). With smaller eggs, use a little less. If it comes out a touch runny, it’ll firm up in the fridge.
- Transfer to a wide-mouth glass jar. Refrigerate. Use within 5–7 days.
A final note
If you’ve been buying store-bought mayo because the homemade version felt intimidating, I want you to know it’s not. It’s five ingredients and a food processor. The hard part isn’t the technique — the hard part is sourcing the right avocado oil so the recipe actually delivers on its “no seed oils” promise. Do that one piece of homework once, and you’re set for years.
This is what food and mood changes that are actually doable looks like in our kitchen. Real food, real fast, no compromise on the things we love. Mayo included.
Until next time, have a beautiful day.
— Chandra Zas